Installing kitchen plumbing requires careful planning and code awareness. Start by defining goals and noting local regulations. Gather a precise tools-and-materials list, then map the layout from shutoff valves to fixtures. Use plumber’s tape on threaded joints and tighten to spec. Ensure a leak-free, accessible waste system and coordinate connections with all fixtures. Troubleshooting, maintenance, and safety steps should follow, with a budget for parts or professional help if needed. The project hinges on solid fundamentals that set the stage for what comes next.
Identify Your Plumbing Goals and Local Codes
Before beginning any kitchen plumbing project, it is essential to define clear goals and identify applicable local codes. This phase emphasizes goal assessment to clarify scope, performance expectations, and timelines, while ensuring code compliance with regional regulations. A documented brief guides design decisions, permits, and inspections, reducing rework.
Clarity supports disciplined execution and accountable progress toward compliant, efficient plumbing installation outcomes.
Gather Tools and Materials for Kitchen Plumbing
Gathering the appropriate tools and materials for a kitchen plumbing project requires a precise checklist that aligns with the defined goals and local codes. The listado includes basic hand tools, adjustable wrenches, pipe cutters, plumber’s tape, sealants, and appropriate fittings. Emphasize tool compatibility and waste disposal considerations to ensure safe, compliant, and efficient work without unnecessary excess. Compliance remains paramount throughout preparation.
Step-by-Step Install: From Shutoff to Test for Leaks
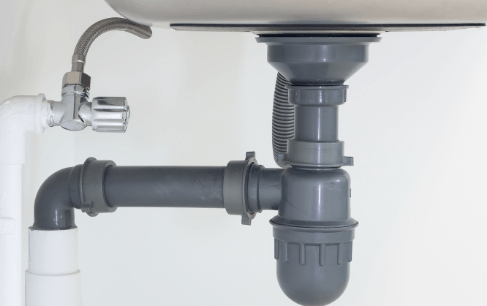
Starting at the shutoff, the installer methodically follows the sequence: connect supply lines to the faucet or appliance, ensure threaded joints are wrapped with plumber’s tape, tighten all connections to manufacturer specifications, and verify that the shutoff valves operate smoothly without resistance.
The process aligns with discussion ideas and considers kitchen layout, ensuring a leak-free, compliant installation and efficient future access.
See also: Tips for Staying Calm in Volatile Markets
Troubleshooting, Maintenance, and Safety Tips
When troubleshooting kitchen plumbing, a methodical approach ensures rapid identification of issues and safe operation of the system. Regular inspection diligence reduces unexpected failures and guides timely maintenance. Practice preventive care: schedule routine checks, replace worn seals, and test valves. Emphasize budget planning to allocate funds for tools, parts, and professional assistance as needed, ensuring durable, compliant, reliable performance.
Conclusion
In sum, a kitchen-plumbing install unfolds as a careful sequence: define goals, verify codes, assemble a precise toolkit, and connect shutoffs, lines, and waste with exacting torque and sealant. When objections arise—space limits or a stubborn joint—the fix lies in measured adjustments: recheck alignment, re-tape threads, and test for leaks before finalizing. This disciplined, compliant approach yields an accessible, leak-free system that supports fixtures and appliances while sustaining safety and long-term reliability.